
Maximize Comfort: The Ultimate Ceiling Insulation Guide For Your Home

Ceiling insulation is one of the most effective ways to enhance the comfort of your home while also reducing energy costs. Proper insulation can keep your home warm in the winter, cool in the summer, and can significantly decrease your heating and cooling expenses. In this ultimate guide, we will explore everything you need to know about ceiling insulation, including types of insulation, benefits, installation tips, and more.
Understanding Ceiling Insulation
Ceiling insulation is a barrier to heat loss and gain, installed in the ceiling space of your home. Its primary function is to keep your home comfortable by maintaining a stable indoor temperature.
Why Is Ceiling Insulation Important?
Insulation plays a crucial role in energy efficiency. Without it, heat can easily escape during the winter and penetrate during the summer, leading to higher energy consumption as your HVAC system works harder to maintain a comfortable temperature.
How Does It Work?
Insulation works by reducing the rate of heat transfer. It traps air within its fibers, creating a barrier that slows down the movement of heat. This trapped air helps to keep warm air inside during the winter and outside during the summer. Visit us here to know more.

Types of Ceiling Insulation
There are several types of ceiling insulation, each with its own set of advantages and disadvantages.
- Batt and Roll Insulation: Batt and roll insulation are made from materials like fiberglass, mineral wool, or natural fibers. These come in pre-cut panels (batts) or long rolls that can be cut to fit specific spaces.
- Blown-In Insulation: Blown-in insulation consists of small particles of fiberglass, cellulose, or mineral wool. It is blown into the ceiling cavity using special equipment, making it ideal for covering irregularly shaped areas and existing structures.
- Spray Foam Insulation: Spray foam insulation is applied as a liquid that expands and hardens, creating an air-tight seal. There are two main types: open-cell and closed-cell.
- Reflective or Radiant Barrier Insulation: Reflective or radiant barrier insulation is typically made from aluminum foil placed on one or both sides of a substrate material. It reflects radiant heat rather than absorbing it, making it ideal for hot climates.
- Rigid Foam Insulation: Rigid foam insulation consists of panels made from polystyrene, polyurethane, or polyisocyanurate. These panels are cut to fit and can provide a continuous layer of insulation.
- Natural Fiber Insulation: Natural fiber insulation includes materials like cotton, wool, and hemp. These eco-friendly options are often treated with fire and pest-resistant chemicals.
Benefits of Ceiling Insulation
Properly installed ceiling insulation offers numerous benefits:
- Energy Savings: By reducing heat transfer, insulation can significantly lower your energy bills. You will use less energy to heat and cool your home, resulting in cost savings.
- Improved Comfort: Insulation helps maintain a consistent indoor temperature, eliminating cold drafts and hot spots. This creates a more comfortable living environment year-round.
- Noise Reduction: Insulation also acts as a sound barrier, reducing the transmission of noise between rooms and from outside. This can lead to a quieter, more peaceful home.
- Environmental Impact: Using less energy means fewer greenhouse gas emissions, making insulation an environmentally friendly choice.
Choosing the Right R-Value
The R-value is a critical factor when selecting insulation for your ceiling. It measures the insulation’s ability to resist heat flow, with a higher R-value indicating better thermal performance. The recommended R-value for ceiling insulation varies based on your climate zone, which determines the level of insulation needed to maintain optimal indoor comfort and energy efficiency.
Climate Zones
Understanding your climate zone is essential for choosing the right R-value. Here are the recommended R-values for ceiling insulation across different climate zones:
- Zone 1 and 2: R30 to R49
- Zone 3: R30 to R60
- Zone 4: R38 to R60
- Zone 5 to 7: R49 to R60
- Zone 8: R49 to R60
These recommendations ensure that your home remains comfortable throughout the year, regardless of external weather conditions. For instance, homes in colder climates (Zones 5 to 8) require higher R-values to prevent heat loss, whereas homes in warmer climates (Zones 1 to 3) can opt for slightly lower R-values while still maintaining efficiency.
Consult Local Building Codes
While these are general guidelines, it is crucial to consult local building codes or a professional to determine the specific R-value requirements for your area. Local regulations may have additional stipulations based on regional weather patterns, building materials, and construction practices.
Factors to Consider
When selecting the R-value for your ceiling insulation, consider the following factors:
- Climate: As mentioned, your local climate is a primary determinant of the required R-value.
- Home Design: The design and construction of your home, including roof type and attic space, can influence the type of insulation and R-value needed.
- Existing Insulation: If you already have some insulation in place, you might only need to add additional layers to achieve the desired R-value.
- Energy Goals: If you aim to maximize energy efficiency and reduce utility bills, opting for a higher R-value can provide long-term benefits.
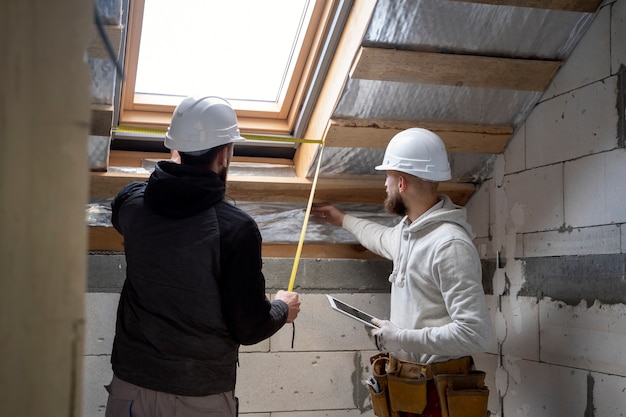
Installation Tips
Installing ceiling insulation can be a DIY project, but it requires careful planning and execution. Here are some tips to ensure a successful installation:
- Safety First: It is recommended to don protective attire including gloves and a mask to prevent potential irritation caused by insulation fibers. Additionally, it is essential to maintain adequate ventilation within the workspace.
- Prepare the Area: Remove any outdated insulation, debris, or obstacles from the ceiling space. Ensure that all air leaks or openings around pipes, ducts, and vents are properly sealed.
- Measure and Cut: Calculate the surface area to ascertain the required quantity of insulation. Trim batts or rolls to precisely match the space between joists, guaranteeing a seamless fit with no spaces left uncovered.
- Install Carefully: Install the insulation ensuring that the vapor barrier is positioned downwards, if relevant. Be careful not to compress the insulation as it may compromise its efficiency.
- Check for Coverage: Maintain consistent distribution across the entire ceiling cavity to promote optimal airflow and prevent obstruction of vents.